
Now that I finally published my second title, The Clever Explorer’s Activity Book, I can share with you the process of making it. I want to show you how to design a book cover for your own project, especially if you are interest in self publishing your book with Createspace or another POD (print on demand) company.
I’m going to show you both the technical and the artistic aspects of my book cover design, but before I start, I must confess: I am 100% self taught. It means that I never went through a professional design training. If you are a professional designer you might see some things that I am doing in a less that ideal manner, and that’s awesome. I would love to receive educational comments.
Let’s begin!
How to design a book cover? Here is my process:
Step 1:
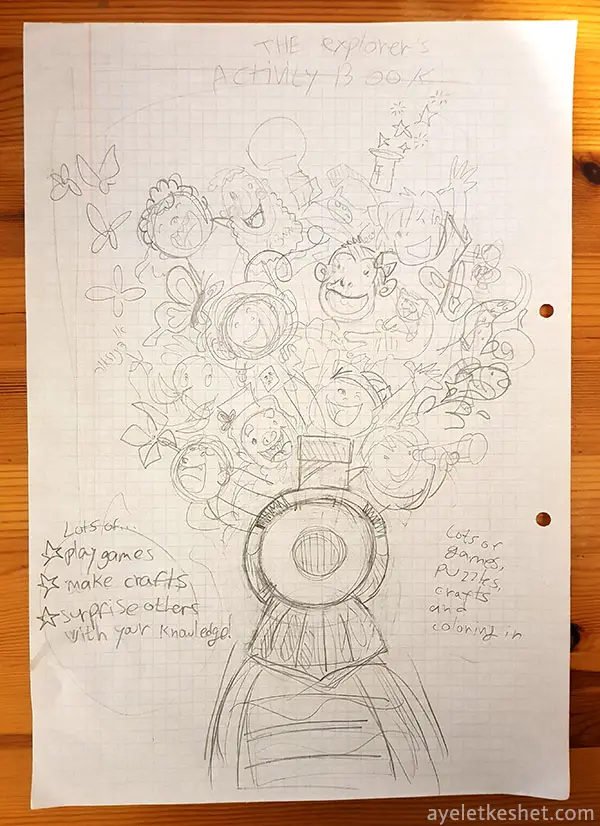
I started with a very loose scribble to search what my cover should look like. Where should the title be placed? What would be my central image? What other texts do I need to include in the cover? How should I compose the different elements?
These are my actual doodles for The Clever Explorer’s Activity Book. You can see I went through some struggles there!
For the central image on the cover, I chose to draw some of the book’s characters riding a train in the sky. One of the strong points of The Clever Explorer’s Activity Book is the diverse topics of general knowledge in it, so I wanted to express this diversity. I picked characters and items that would intrigue the viewer’s curiosity.
► Tip: every part of your design can carry information about your book. The text is not the only chance to do it.


Step 3:
Before I start designing the cover I have to prepare the Photoshop file. I published my books with createspace, so I followed the guidelines they provided. They also offer automatically generated cover templates to some of the book sizes.
To make the Photoshop file for the book cover you must calculate the width of the book’s spine (according to the number of pages), add bleed, mark the internal margins and mark the areas on both sides of the spine that might be affected by the folds of the cover (this area is called “gutter”. You don’t want any important text or elements there).
I changed the blending mode of the template to multiply so that I can see the lower layers through it and added some guidelines.

Step 4:
I scanned the sketch of my central image and placed It in the Photoshop file. Then I placed the title, the credit and some other texts. I still didn’t choose any fonts and was not 100% sure what the extra texts would say, I just had to place something so that I can plan the central image’s size.

The back cover needs to have a blurb, a barcode and an ISBN.
I chose to add the logo of my publishing company and a link to my website, too.
With Createspace, you can either buy your own ISBN and barcode or use ones provided by CreateSpace. I wanted to have my own, because then I am the publisher and I have 100% control on what happens with my book.
► Tip: At a workshop about self publishing I learnt the rule: ‘The front cover sells the back cover and the back cover sells the book’. I try to keep this in mind when I design my book covers.
Step 5:
I copied my lousy sketch to a file I prepared in Illustrator and redrew it with the pen tool.
The blue and pink frames are my reminders to stay away from the margin and to extend the lines that touch the edges until beyond the bleed.
You can see some of the heroes of the book resting next to the art board. I dragged them from the internal pages of the book, for reference. There is a lot of mess… I didn’t notice the mess while I was working on it 0_0.

Step 6:
The outlines are back to the Photoshop file. Before I color the drawing, I choose a background color for the whole cover. It’s going to be the sky so, blue! With some darker areas to make it less flat.

► Tip: Choosing the background color early helps me choose the colors of the details later on.
Step 7:
The fun part: coloring the illustration.
Usually I like to put each color on a different layer. It makes it easier to change colors later and to place the highlights and shadows on each element without having them leak to the other elements.
But in this case I chose to place all the flat colors on one layer, and make a new layer for the highlights and shadow. I did it because I was creating the whole cover on one file and didn’t want gazillion layers there.
If the central piece were very complex I would have made it on a separate Photoshop file.
Step 8:
After I color the flats I leave it aside and move to the title. I wait with the final details of the coloring because I might want to make some changes to the colors after I get the title ready.
I try out different fonts and styles until I choose something I like.

Step 9:
I want the central image to pop and look exciting so I add the starburst at the back and sprinkle glitter with a brush I created. Shadows, highlights and blushes on the cheeks add more life to the image. I also color the outlines.
I sketch the clouds but don’t refine them yet, because their final shape will depend on the back cover.
The rainbow at the back adds color as well as dynamics.

► Tip: I like to have varied motion lines in my covers. It brings interest and life to the design.

Step 10:
I placed a bright white background behind the blurb and framed it with more of the stars and glitter. The two sides of the cover need to be related, so I used the same elements.
► Tip: The blurb is super important. It needs to answer the questions: What is this book? What is in it? Why do I need it? How will I feel or be once I read it? How is it better than other similar books?
Step 11:
Buyers might want to see some examples of the inside pages of the activity book. There’s no need to count on the “look inside” feature of Amazon. In general, it’s always better to embed important information into your own design rather than counting on others to display it.
I added samples of the pages to the cover, choosing ones that will show the artwork style, the variety of the activities and their complexity.
Step 12:
And finally, the clouds.
Now I’m happy with my cover. It has all the information I wanted to present, it’s colorful and attractive.
I save it as a PDF and upload it to Createspace.

What do you think? Did you find some of tips helpful? And maybe you have some good tips for me? Let me know!


